Sunday, August 10, 2014

Dogfight: Shuttles vs. Z-95s

After finishing the Evacuation from Hoth campaign, Beni and I decided to play a standard dogfight in order to try out the new ships.


I wanted to try the new Z-95s, and so created a list heavy with them. I thought both Airen and Dutch Vander would combine very well with cheaper Z-95s, because they would be able to give them Target Locks, even if they moved first, and thus using them as missile platforms would be a possibility. Originally, I thought about using 3 Bandit Z-95s, but then I was forced to use Concussion Missiles, and as I was very interested in trying the Homing Missiles for the first time, I changed my list and used two Tala Squadrons Z-95s. That had also the positive advantage of allowing me to also equip my Z-95s with the Munitions Failsafe upgrade.


Rebels (100 points) (played by JL)
- Airen Cracken with Homing Missiles, Predator and Munitions Failsafe (28points)

- Dutch Vander with R2-D2, Flechette Torpedoes and Ion Cannon Turret (34points)
- Tala Squadron Z-95 with Homing Missiles and Munitions Failsafe (19x2=38 points)

Beni wanted to try out the Shuttles. He created a list to prevent the enemy from easily hitting the Shuttles and to remove any maneuverability flexibility by adding Stress tokens. Carnor Jax was there to prevent enemy ships from using Focus tokens, a very good combination idea with the Sensor Jammers.


Imperials (100 points) (played by Beni)
- Carnor Jax with Outmaneuver and Stealth Device (32 points)
- Omicron Groups Shuttle with Sensor Jammer, Recon Specialist, Tactician and Engine Upgrade x2 (34x2= 68 points)


Setup and first maneuvers

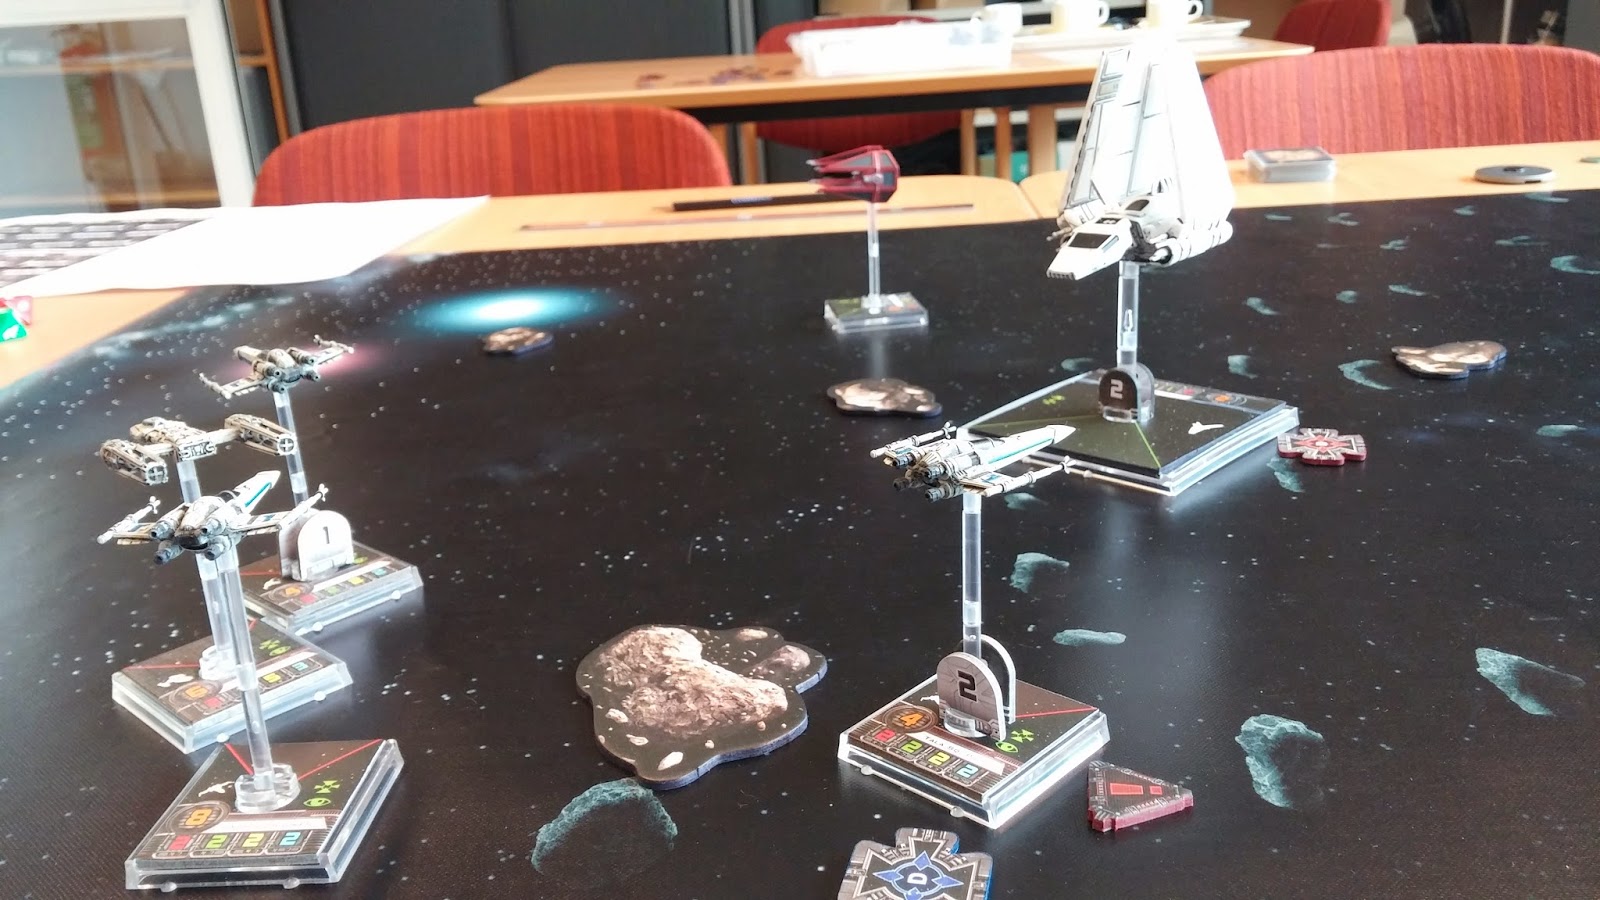
Beni won the Initiative in the throw and positioned the asteroids. He placed them quite well, making it difficult for me to block the movement of his Shuttles. He topped it by placing both Shuttles in his middle of the board, so that I had no easy way to try and outnumber one of his Shuttles.

The Shuttles approach the compact Rebel group along two lanes left by the asteroids

Surprisingly, for me, Beni kept Carnor Jax in the back... I suppose Carnor wanted to show off his red ship to the spectators and spent his first 2-3 turns slaloming about asteroids and the Shuttles.

Meanwhile, Carnor Jax tries his red ship by slaloming along the board...

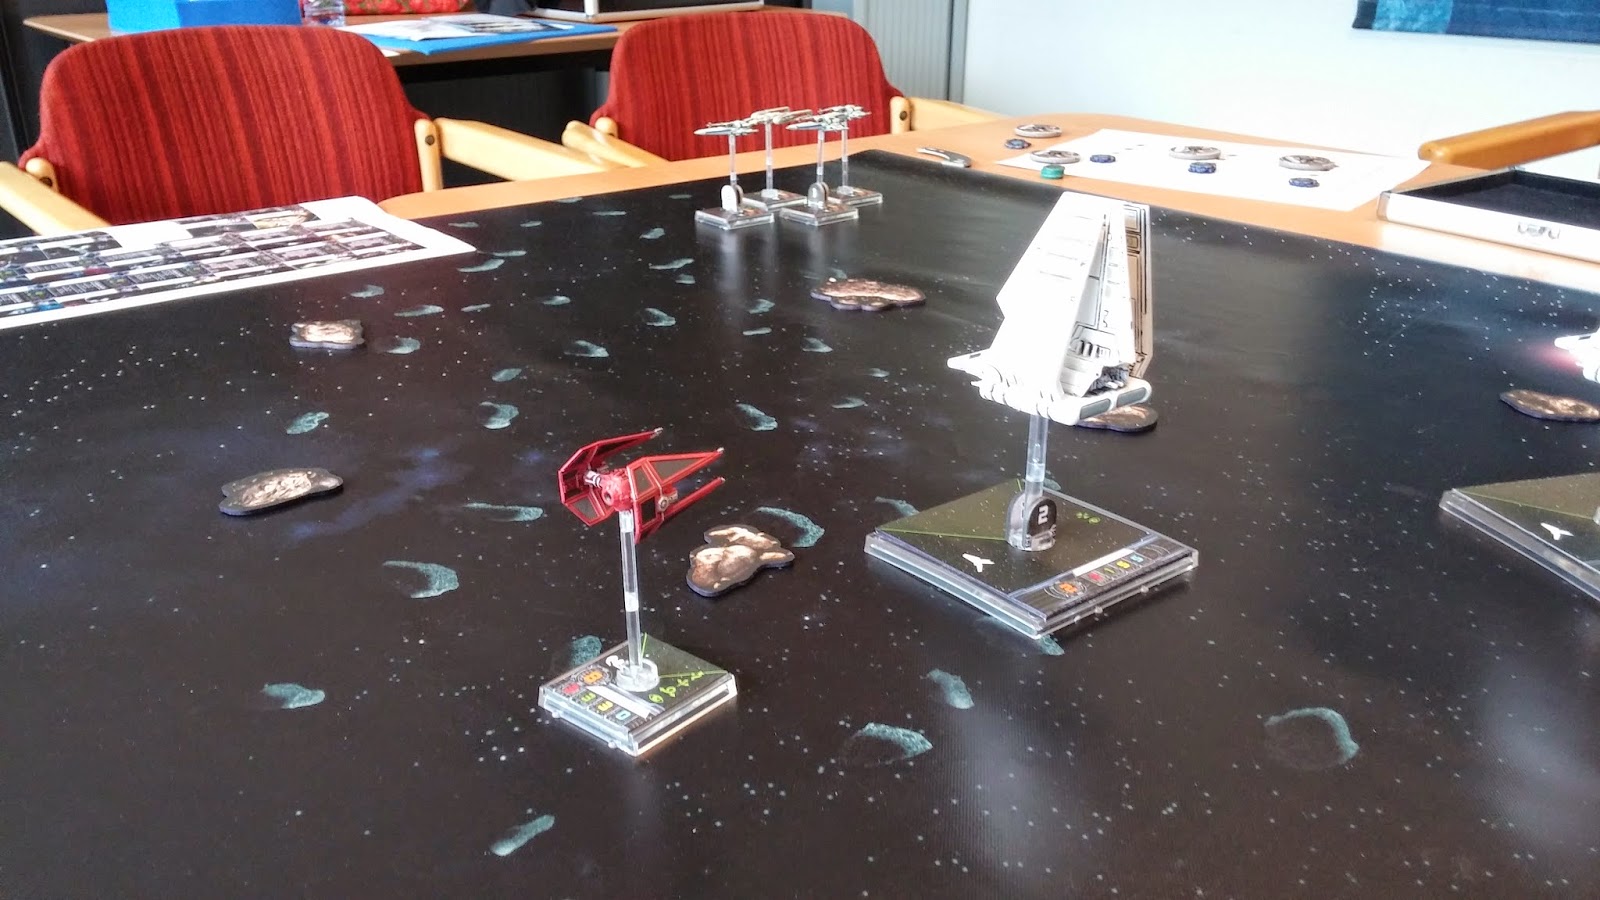
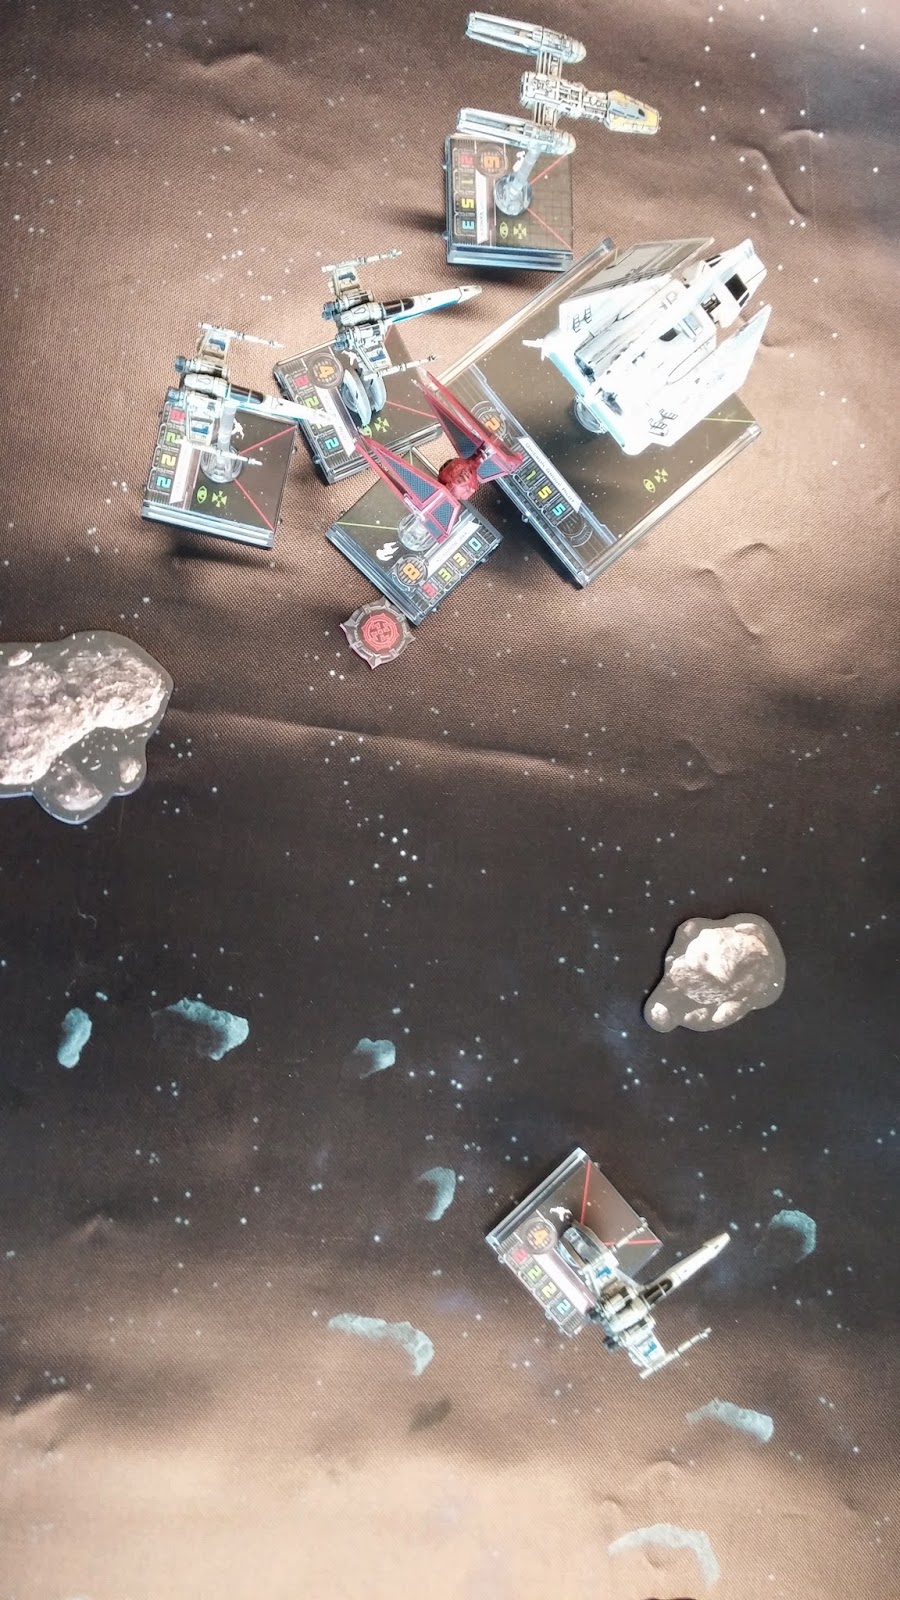
In the meantime, I feinted with a maneuver of my squadron to the right...
The Rebel squadron stays in compact formation and seems to be approaching the Imperial ships around the asteroid to their left
 ... and then I changed directions to try to surprise Beni... It worked perfectly! On top of that, Beni, who thought I was going to be more or less in the center of the board, executed a pincer maneuver and stopped his central Shuttle while accelerating with the one to his right flank.

We have him in our sights!

Meanwhil, Carnor keeps smiling to a particularly interesting blonde in the public...
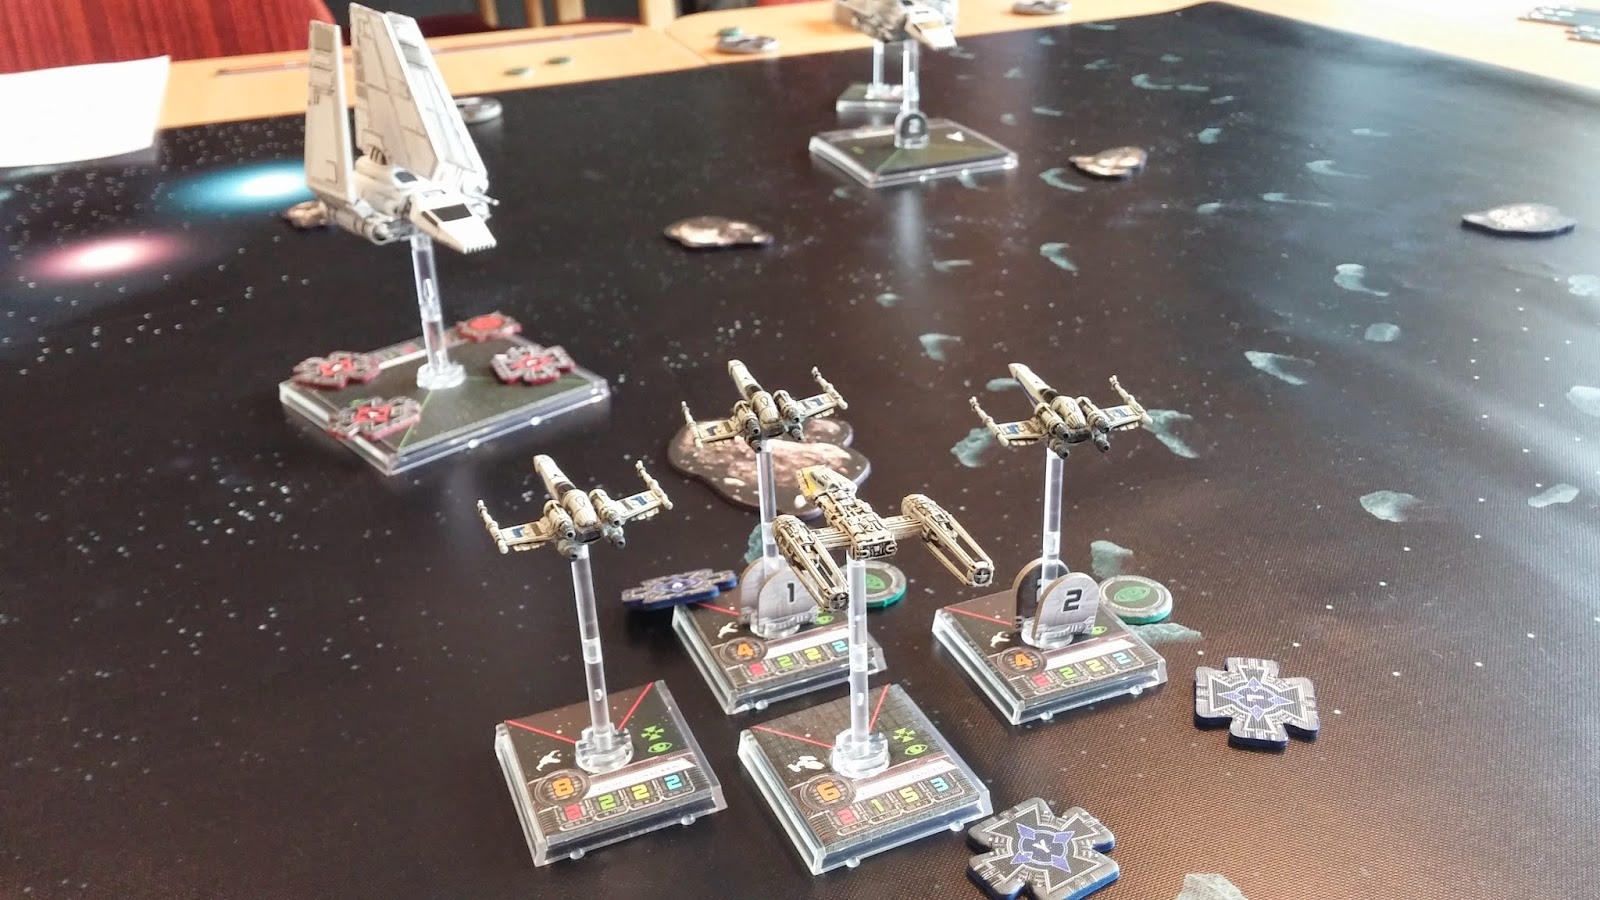
First Blood

Thanks to Airen and Dutch Vander, both Tala Z-95s shot with Target Lock and Focus... This (and being shot with 3 Homing Missiles and the Y-Wing Ion Cannon) was too much for the Shuttle, which exploded after receiving so much incoming damage (a total of 11 damage out of a possible maximum of 13... Focus+Target Lock is almost equal to maximum damage). The Sensor Jammer of the Shuttle only prevented one damage from the initial Airen's attack.

The missile gang does not joke!
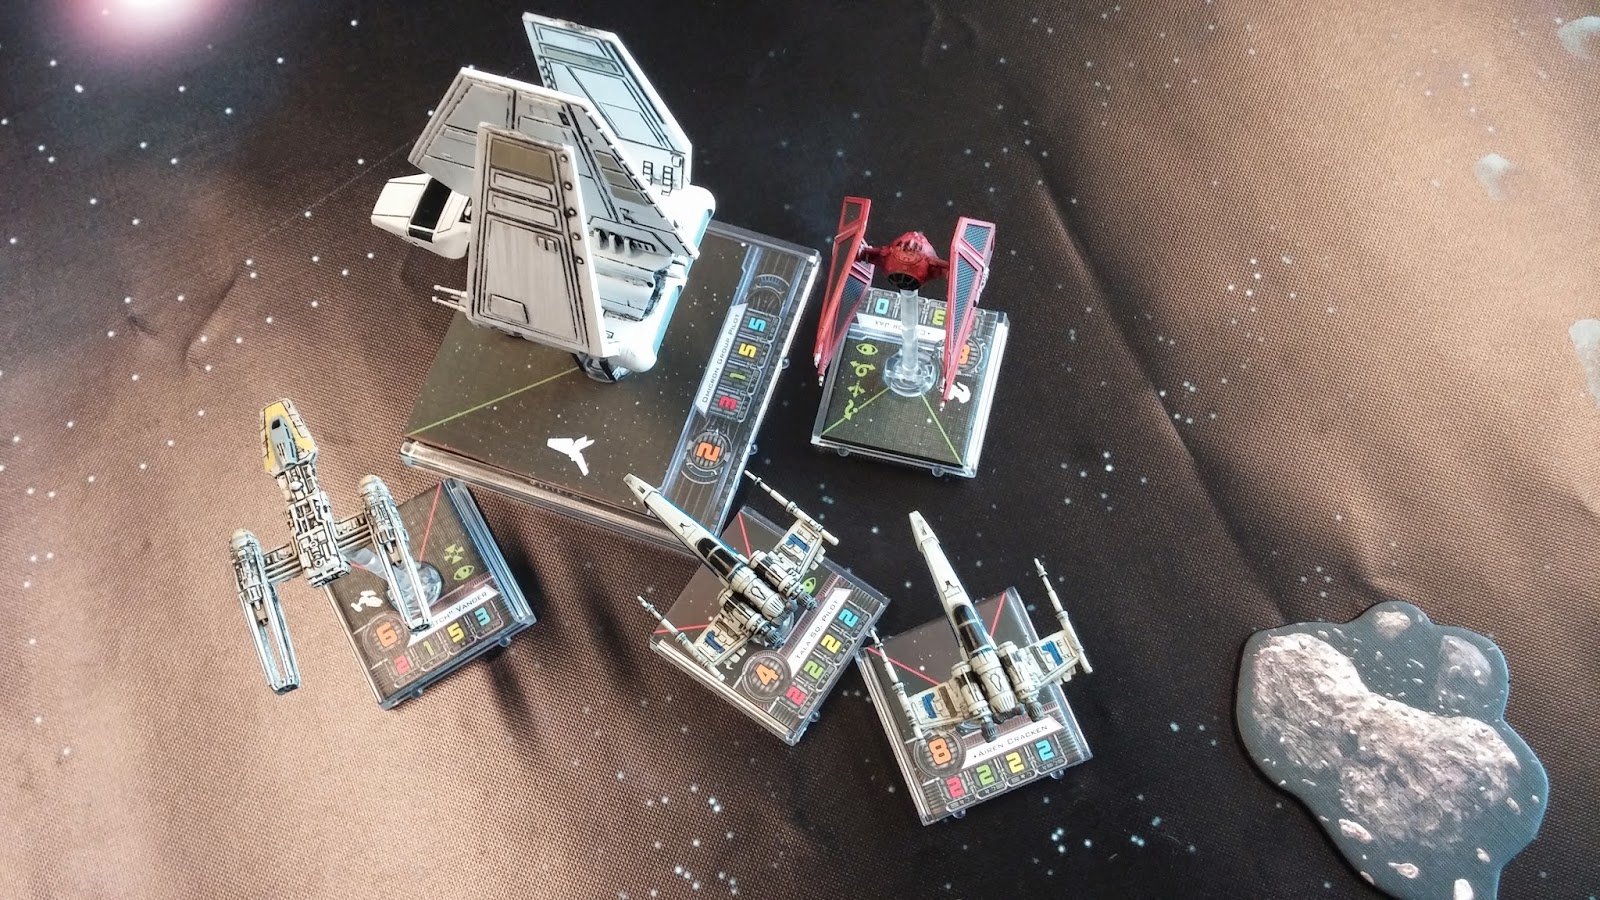
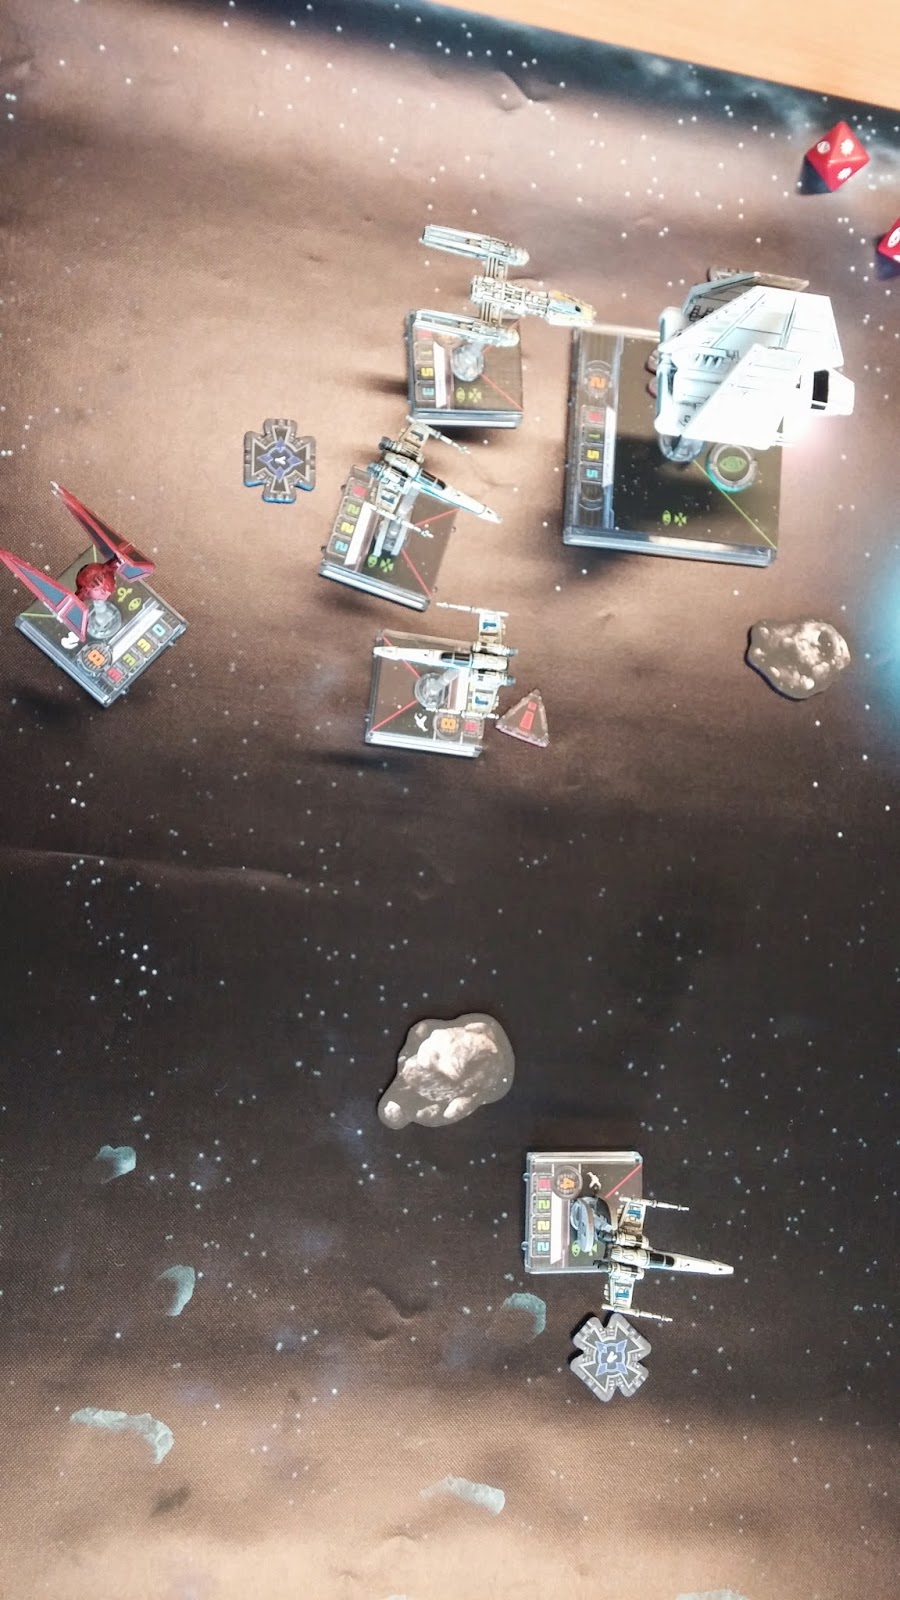
Dogfight

Things became quite messy. I had to avoid the asteroid and divided my squadron, while Carnor realized there was something going on and approached the battle...

Big rock ahead!


Beni used the Tactician upgrade for the first time and almost one shot one of the Tala Z-95s.
And I started slowly piling damage on the Shuttle... death by thousand paper cuts, they call it.
That Shuttle looks scary once you have no more missiles!
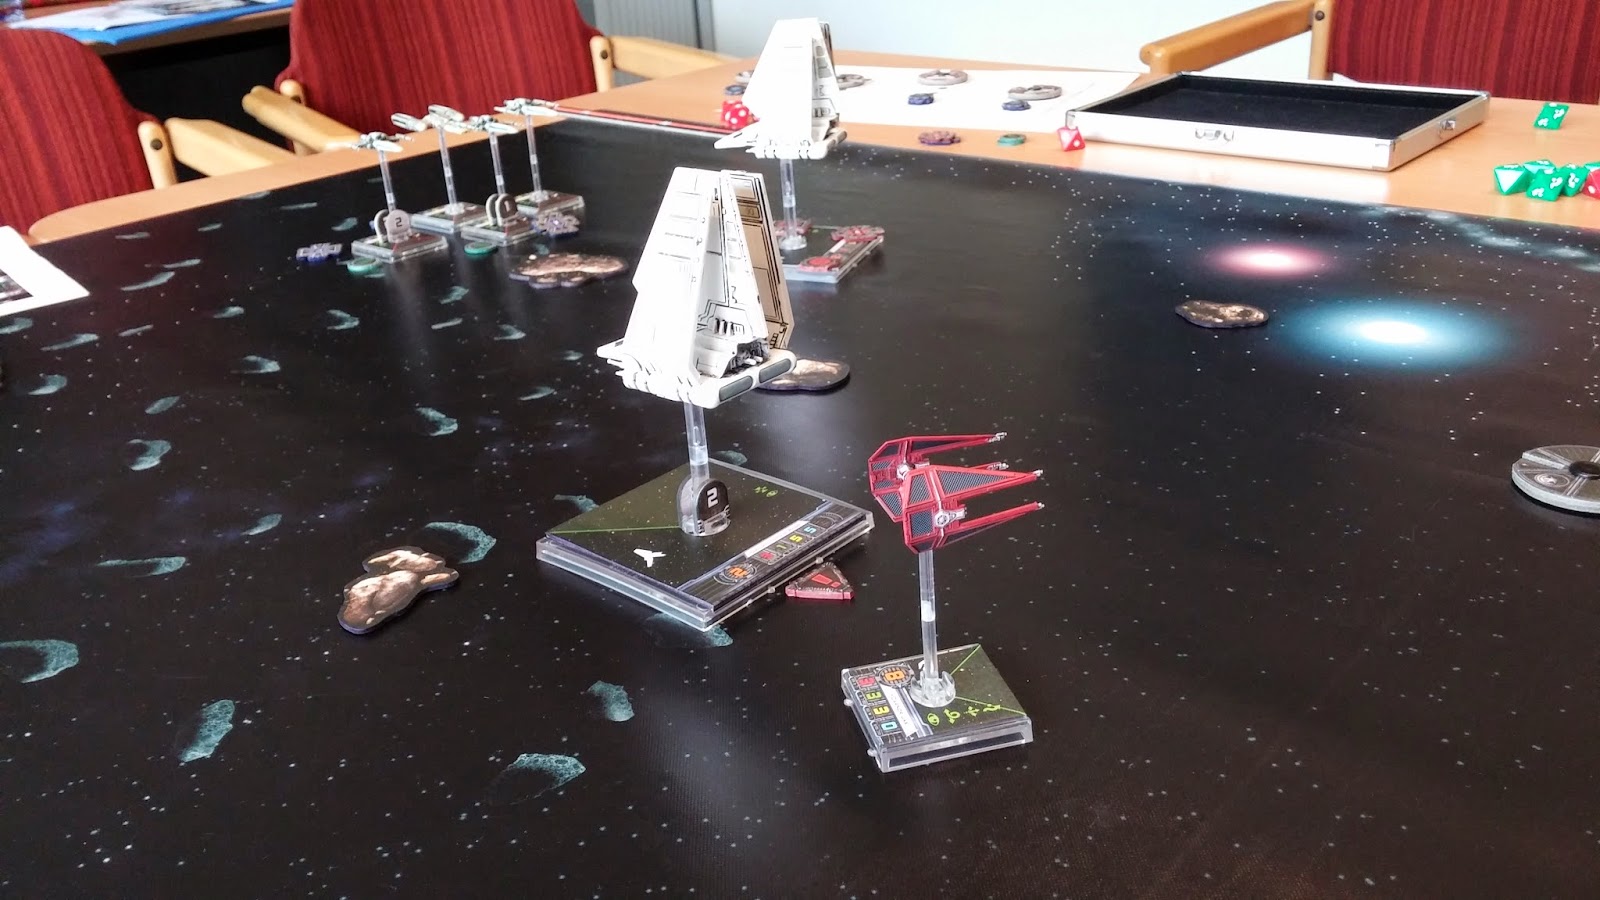
 Some expert maneuvering on Beni's part allowed him to block all my ships, and gave Carnor a chance to use his Predator upgrade... Welcome to the fight, Carnor!
After a boost, Carnor has one of the Z-95s right where he wants...

Unfortunately for Carnor, his mind was still on the blonde, and he did not shoot too well, even though the Z-95's defense had been downgraded
 The fight's result seemed now very clear, and on top of that I managed to ionize Carnor with Dutch Vander while adding some extra damage on the Shuttle with Airen.
Dutch Vander ionizes Carnor
 Even though Beni made the Shuttle stop, I just kept behind him and blocking Carnor's path... Still, I realized he now could shoot on Airen... it looked dangerous, although with 4 attack dice against 2 defense, chances of him destroying Airen in one hit looked low.
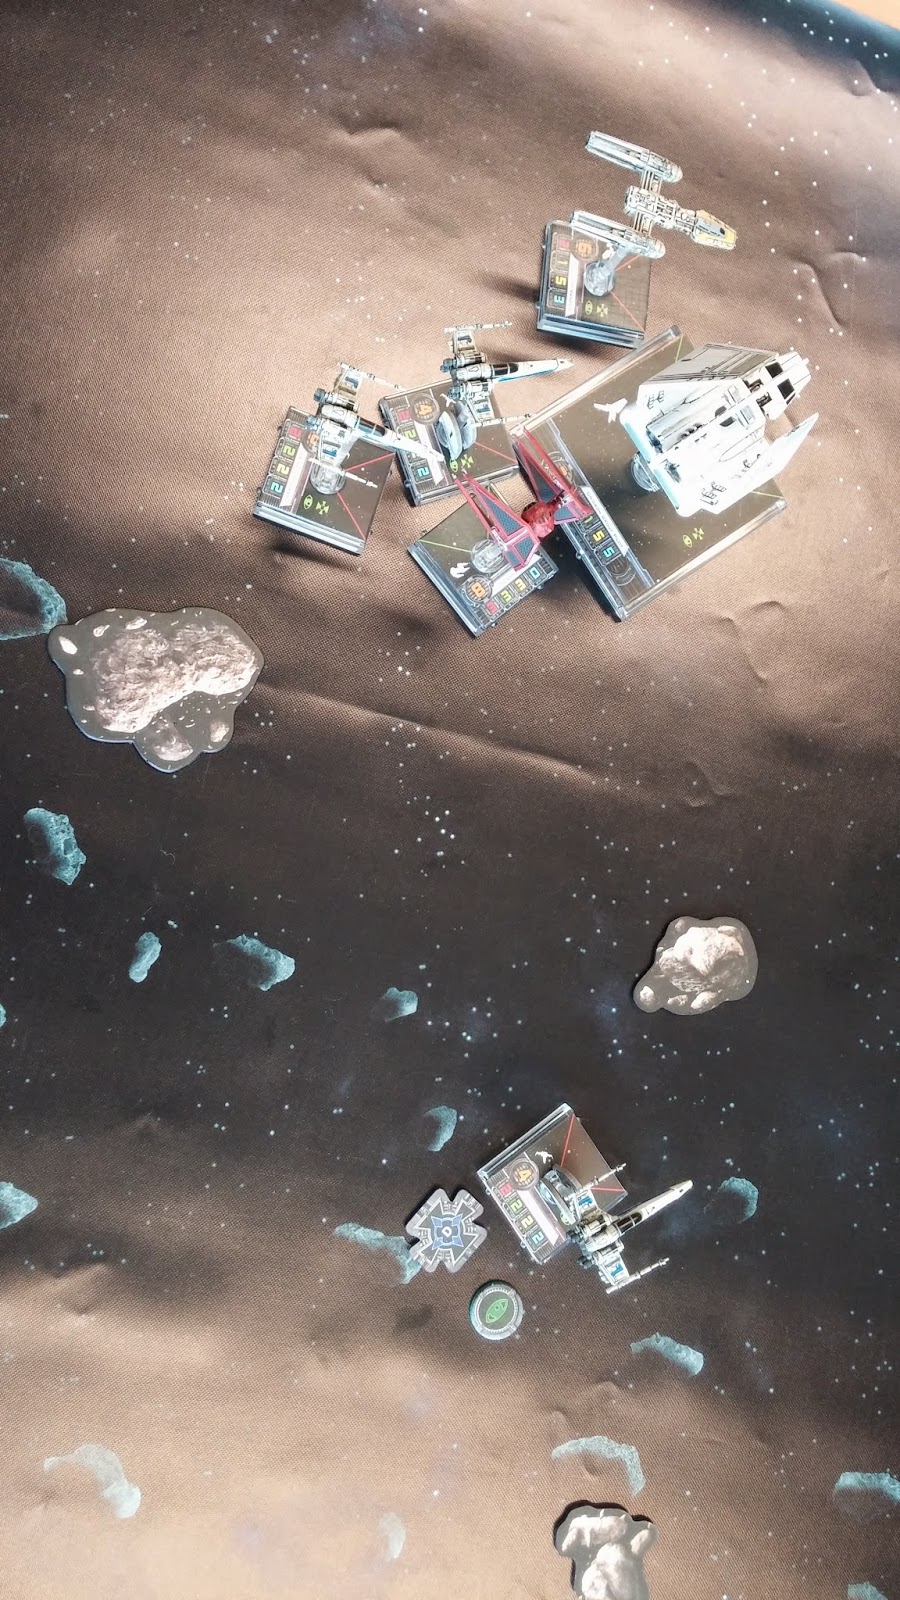
The melee goes on...
 Carnor piled two damage on Airen and was ionized again...
And Carnor becomes ionized a second time
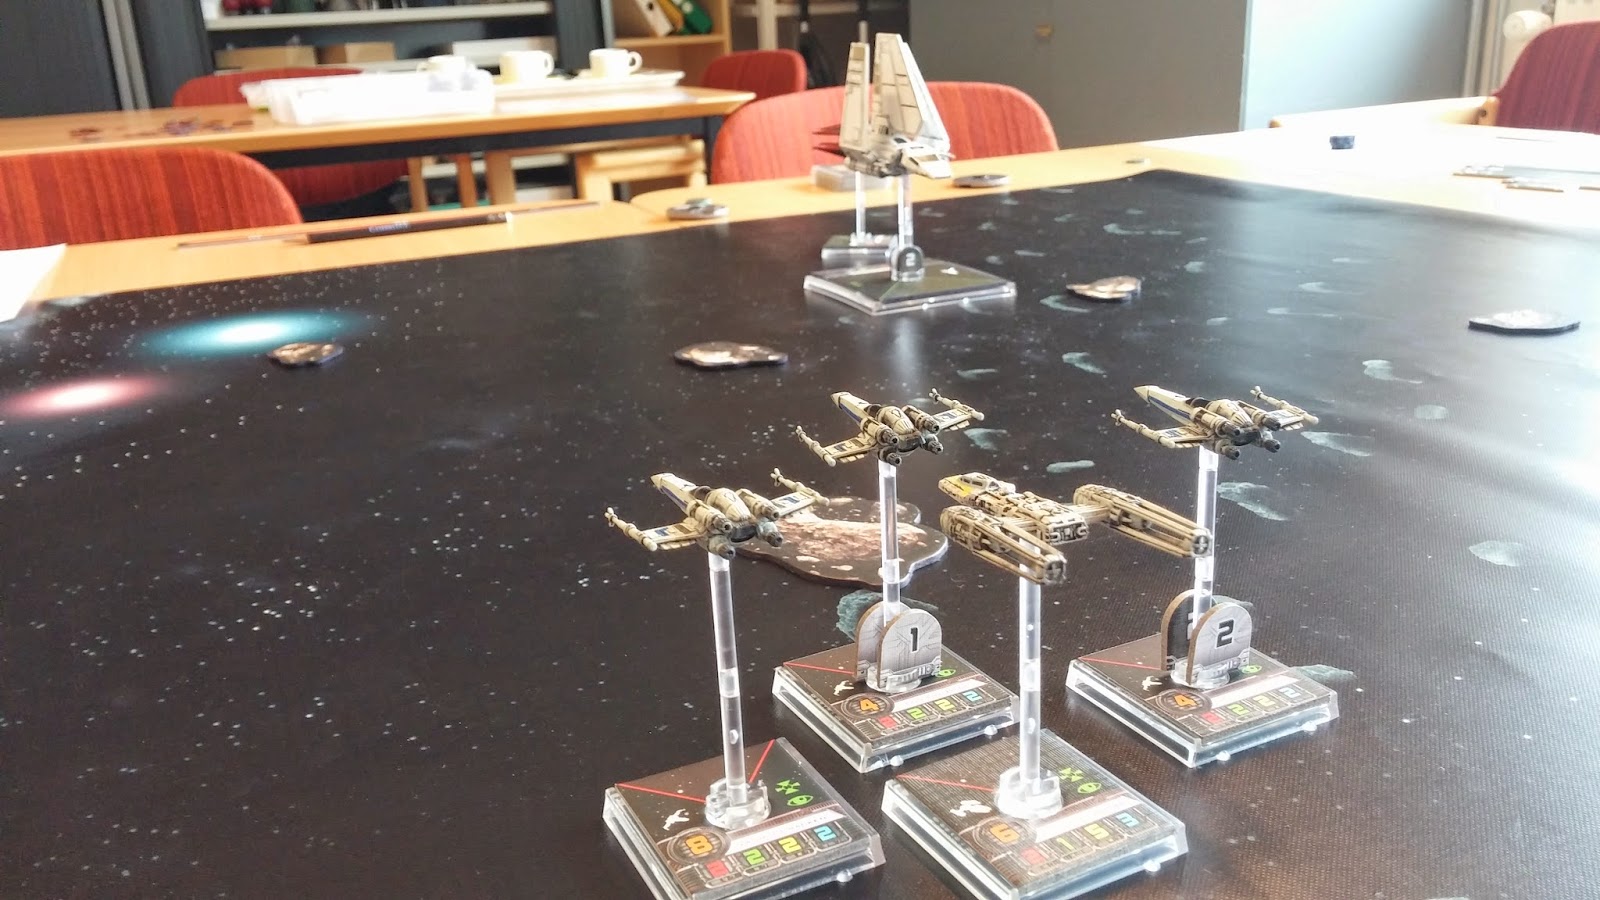
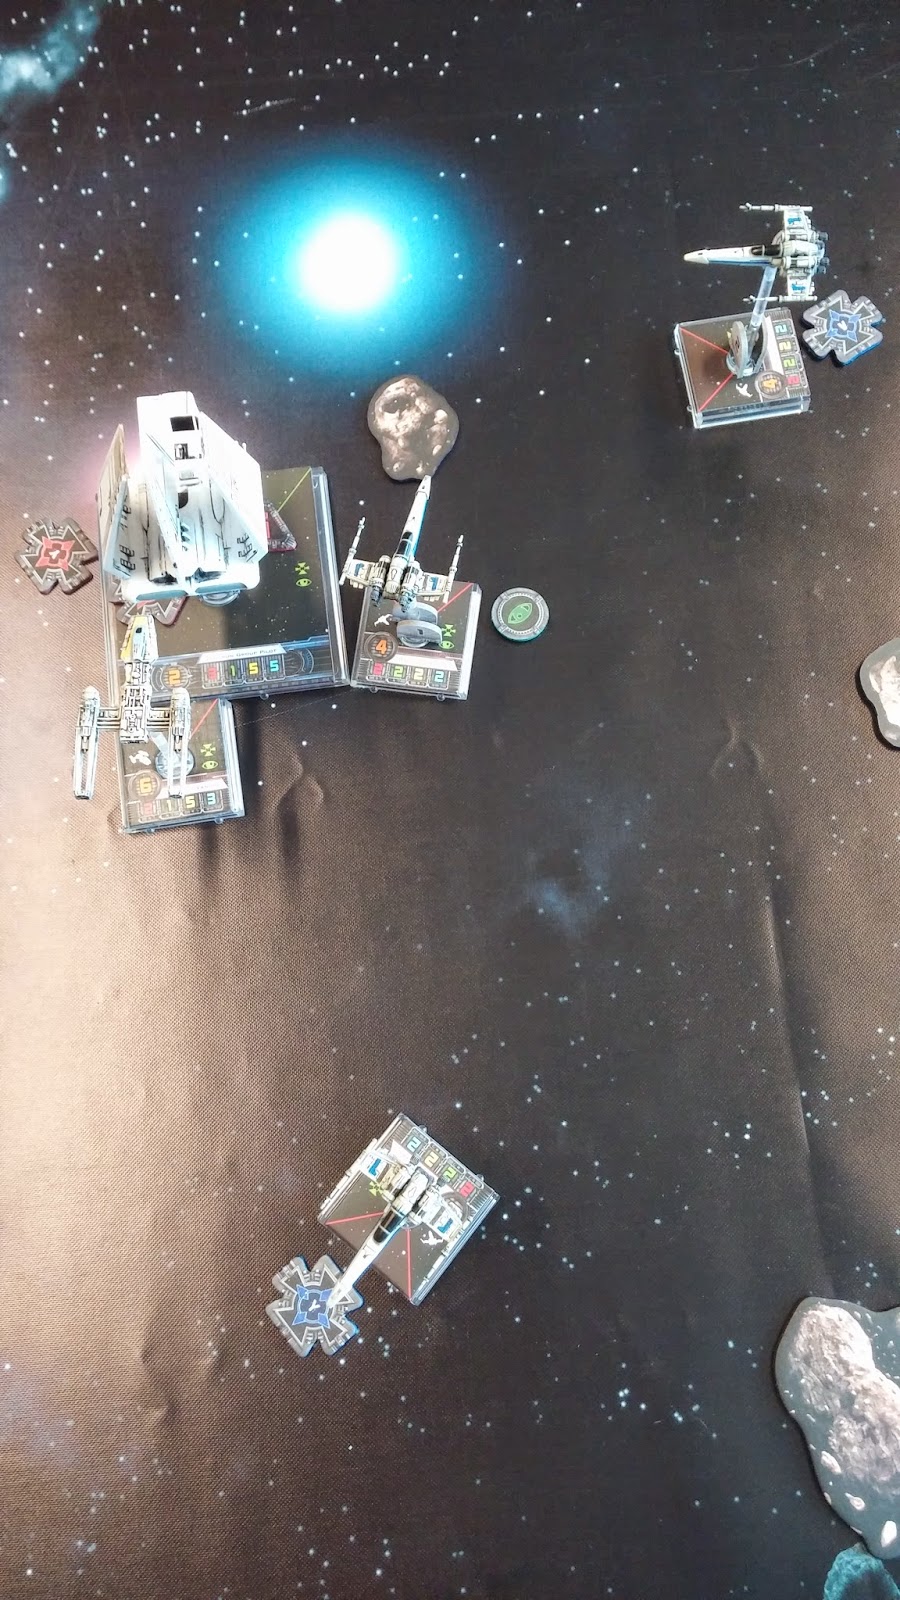
My last maneuver was quite easy, I let the Shuttle coast in front of me and K-turned with Airen to finish Carnor.
All Imperials have now Rebel ships on their 6

Airen deals the last point of damage to Carnor

and the Shuttle survived one more turn
 
The last hit on the Shuttle was obtained by the damaged Tala Z-95

I think the battle was decided when Beni fell for my feint, specially considering that he maneuvered in a way that left one of his Shuttles stranded against my whole squadron with no support from his other ships... Also, Carnor arrived very late to the fight and his Focus-blocking ability, which would have worked great with the Sensor Jammers, was not used enough.

Then main tactical idea to get from this dogfight is that you should always try to have your ships in positions in which they can support each other, so that the enemy won't get easy free attacks without you being able to respond in some way.

Saturday, August 2, 2014

Evacuation of Hoth, Mission 3

Mission H3 - Asteroid Gauntlet

(third part of FFG's Evacuation of Hoth campaign)

Rebels (GR-75 with Combat Retrofit and 125 points) (played by JL)
- GR-75 with Combat Retrofit, Dutyfree and WED-15 Repair Droid (44 points)

- YT-1300: Han Solo with Homing Missiles, Chewbacca and Gunner (60 points)
- Gold Squadron Y-Wing with R2 Astromech and Ion Cannon Turret (24 points)
- 2x Rookie X-Wing (2x21 = 42 points)

Imperials (125 points) (played by Beni)
- Soontir Fel with Push the Limit and Targeting Computer (32 points)
- 2x Scimitar Squadron TIE Bomber with 2 Cluster Missiles each (24x2= 48 points)
- Scimitar Squadron TIE Bomber with Cluster Missiles (20 points)
- Tempest Squadron TIE Advanced with Cluster Missiles (25 points)


(the scene starts with the GR-75 and its weakened escort squadron approaching an asteroid field. Camera shows the bridge of the GR-75)

GR-75 Captain: It looks like we are almost out of the system. Navigators, start preparing the jump to hyperspace.


Radar operator: Captain, we have incoming Imperial ships surrounding us! It's a traap


Evacuation of Hoth, Mission 2

Mission H2 - Blockade Run

(second part of FFG's Evacuation of Hoth campaign)

Rebels (GR-75 with Combat Retrofit and 140 points) (played by JL)
- GR-75 with Combat Retrofit, Dutyfree, WED-15 Repair Droid, Frequency Jammer and Backup Shield Generator (51 points); started with Damaged Stabilizers card

- YT-1300: Han Solo with Marksmanship, Homing Missiles, Chewbacca and Gunner (63 points)
- Grey Squadron Y-Wing with Ion Cannon Turret (25 points)
- Gold Squadron Y-Wing with Ion Cannon Turret (23 points)
- Red Squadron X-Wing (23 points)

Imperials (200 points) (played by Beni)
- Initial Group: 2x Tempest Squadron TIE Advanced with Cluster Missiles (25x2= 50 points)
- Group A: 2x Scimitar Squadron TIE Bomber with 2 Cluster Missiles each (24x2= 48 points)
- Group B: Storm Squadron TIE Advanced with Cluster Missiles (27 points)
- Group C: 2x Scimitar Squadron TIE Bomber with 2 Cluster Missiles each (24x2= 48 points) 
- Group D: Storm Squadron TIE Advanced with Cluster Missiles (27 points)


(the scene starts in a briefing room in the Rebel base in Hoth)

Rebellion Officer: well, it seems our decoy Transport group worked perfectly and has attracted most of the Imperial heat... We'll send our main Transport group in a few minutes on a trajectory almost opposite to that of the decoy Transport... I hope you all slept well, ladies...


(some minutes later)

Trooper Cartman Zherooh: Unidentified GR-75, you are exiting a blockaded system. Following order 34890 of Emperor Palpatine, you are hereby requested to stop the vessel and prepare for boarding and a customs check... uum, they are not stopping...they are coming directly at us!

Trooper Kenny Jax Junior: Yes, they are not stopping! Let's light up that bastard!


Two TIE Advanced charge the GR-75 head on while its escorts flanks them

The Y-Wings attack the flank of the approaching TIE Advanced

The TIE Advanced launch their cluster missiles on the reinforced front section of the GR-75 without causing much damage, and one of them is ionized by the Y-Wing escorts
Trooper Cartman Zherooh: Evasive maneuvers!

Trooper Kenny Jax Junior: I can't! My controls are not reponding! (mumbling to himself) I think I'm having a dejà vu... (a big explosion and Kenny Junior goes straight to Jedi Other World)

Trooper Cartman Zherooh: Bastards! They killed Kenny Junior! Frigate South Garden, please send reinforcements! A GR-75 transport is trying to break the blockade... they are shooting at us!


Only one of the TIE Advanced dodges the incoming GR-75 which crushes and destroys the other TIE Advanced. Meanwhile, two TIE Bombers approach the back of the Transport and are met by the Han Solo and his YT-1300.


The GR-75 jams both TIE Bombers preventing them from gaining Target Locks and shooting missiles at the Transport. Han Solo starts piling damage on the Bombers.

Meanwhile, the Y-Wings ionize the Bombers to make their mission even more difficult


Frigate South Garden: That Rebel scum is trying to escape the planet! Turbolaser batteries: fire on the transport!

Trooper Cartman Zherooh: Wait! I'm still in the line of fire!

TIE Advanced 1 receives the last point of damage from Turbolaser fire... One would call this friendly fire, but there are no friends in the Imperial Navy


Meanwhile, one of the Bombers has managed to launch one of its missiles against the Transport, but both are assaulted by Ion Blast fire from the planet and fire from the GR-75 escorts


Han blows up one of the Bombers

And the Y-Wings take care of the last Bomber
Sergeant Stan Nilar: Well, let's see what these two no-gooders are doing. They activated again the distress signal; I guess they got drunk again... Wait, what's that? Those Y-Wings look dangerous...

A lonely TIE Advanced tries to approach the GR-75

and is quickly blown to pieces

Two more Bombers are sent from the Frigate group and decide to maintain a bit the distance

They wait until one last TIE Advanced also joins the battle

The TIE Advanced dodges the X-Wing escort

The Imperials try a desperate last attack, but they have very little time left

The last Imperial ships get entangled with the Rebel escorts, and the Transport makes its escape


Tactical Comments

This battle was quite easy for me playing the Rebels. Beni tried again a list based on Bombers and Cluster Missiles, which is very scary against a GR-75 with its 0 Agility, but he decided to directly attack the GR-75 with each of his reinforcements instead of waiting for 2-3 groups to join forces and do a more dangerous attack on the GR-75.

This meant that I was able to pick his ships one by one and always had a big numerical advantage.
Also, because Beni did not attack the escorts, I was able to keep all my firepower until the end. Finally, causing 2-3 damage per turn against the GR-75 is not enough, because it can easily recover 2-3 shields per turn.

About my tactics, I liked the effect of the Y-Wings and their Ion Turrets. I think they denied the Imperial ships a lot of their mobility and they were the cause for the demise of one of the first TIE Advanced that attacked the Transport.

Finally, the Heavy Bombardment tokens added an extra level of tactics to the mission. I liked them very much and I think I'll probably use this mechanics to change a bit the Frigate Fire mechanics I designed for the 4th mission of my Pirates' Run campaign.

All in all, a very nice mission, even though our battle was an easy Rebel win.

Saturday, June 28, 2014

Evacuation of Hoth, Mission 1

Mission H1 - Evacuation

(first part of FFG's Evacuation of Hoth campaign)

Rebels (GR-75 with Combat Retrofit and 125 points)
- GR-75 with Combat Retrofit, Dutyfree, WED-15 Repair Droid (44 points)

- YT-1300: Han Solo with Marksmanship, Concussion Missiles, Chewbacca and Gunner (62 points)
- Luke Skywalker in X-Wing with R2-D2. Elusiveness and Shield Upgrade (38 points)
- Rookie X-Wing (21 points)

Imperials (100 points)
- 2 Scimitar TIE Bombers with Proton Torpedoes, Cluster Missiles and Seismic Charges (26x2= 52 points)
- 4 Academy TIE Fighter (12x4= 48 points)


(The scene starts in a spaceship hangar. People dressed in jumpsuits run around. Sounds of wailing sirens and explosions in the background)


Rebellion Officer: Hey, kid (pointing to a youngster hidden behind some crates) I saw you the other day playing in the arcades with the GR-75 simulator and you got the top score. All pilots of the GR-75 in Hangar Bay 1 have been injured in an explosion, so you'll have to pilot that GR-75. You'll use it as a decoy and try to escape through Theta Sector, because our main GR-75 group will try to escape the Imperial blockade in a different sector. Here, take the keys!

Kid: Erm, OK, Sir! Will I get any escorts?
 
Rebellion Officer: Sure, a couple newbies will go with you, and there's this Daredevil scoundrel that also has to go in the same direction.

(after some uneventful minutes of space flying, the kid realizes he was using the astronavigation maps upside down)
Han Solo: "Looks like the kid took us into a minefield!"


Meanwhile, after having been reprimanded for destroying a speeding spaceship with a torpedo hit while patrolling the Erasmus system (see http://xwingeleventhhour.blogspot.nl/2014/02/mission-3-big-game-hunting.html), Sergeant Stan Nilar and his platoon has been posted in the Theta sector surrounding Hoth, where intelligence says no Rebel ship will dare enter.

Sergeant Stan Nilar: Man, this is boring like hell. And these ships are really slow, nothing like those amazing Interceptors...


Two TIE Bombers and their escorts approach the GR-75 at full speed. The escorts divide to try to intercept them.

Trooper Kyle Sularen: Sergeant, we have an unidentified Transport ship approaching the Old Derelict Minefield (a minefield set during a long past and forgotten war).


Sergeant Stan Nilar: OK, fellows, let's get some fun... Unidentified GR-75, you are exiting a blockaded system. Following order 34890 of Emperor Palpatine, you are hereby requested to stop the vessel and prepare for boarding and a customs check... uum, they are not stopping... Trooper Kyle, give them a warning shot!

The X-Wings are protecting the left flank of the GR-75 Transport

Han Solo: I see some Imperial fighters approaching our flanks. Luke, take the left and I'll protect the right flank...

Han Solo decides to go solo against the second TIE Bomber squad

One of the mine explodes and ionizes the YT-1300
While the YT-1300 drifts away, one of the TIE Bomber squads avoids Han Solo's ship and gets close to the Transport, though Han manages to destroy one of the TIE Fighter escorts
Han Solo: Damn! Chewie, we hit a mine. Try to fix the damage while the Gunner takes down the TIEs!

Trooper Kyle Sularen: Sergeant, they are firing on us! I'm using my torpedoes right away against the GR-75.

Meanwhile, at the other side of the Transport...

Kid: Uumm... let's see what this lever here does... (the GR-75 goes full throttle and veers to the left crushing into the X-Wing Rookie)... Oh oh, sorry hoor! I think I'll try veering right next.

In the other flank of the Transport, things are getting even more difficult for the GR-75, which stumbles through the Rookie X-Wing obliterating it


The GR-75 then veers right, crushing into Luke's X-Wing
Kid: Oh oh, sorry hoor! I think I'll better find an escape pod...


Surrounded by Imperial TIEs, the GR-75's shields quickly give way to the Torpedo barrage
Trooper Kyle Sularen:Oops! Sergeant, I think we were too eager with the missiles; there's not much to inspect now...

Sergeant Stan Nilar: Well, no worries... there's nobody here to report us... I won't write this in the report...


Han Solo: Well, who gave a GR-75 to a kid for piloting? This kind of silly things only works in movies... Chewie, configure the hyperdrive to get us to Cloud City... I need to contact Lando...


Friday, May 23, 2014

First X-Wing tournament

On the 17th May (one week ago) I participated in my first complete X-Wing tournament!

Well, it was not really my first, because in March I had played two rounds in another tournament in the same shop... I made so many mistakes in my first games, constantly bumping into any asteroid that came into my pilots' view... On the other hand, I learned a lot about maneuvering!

The shop the tournament took place in was Tabletop Kingdom in The Hague, a great place with plenty of space to play!

The shop was quite busy during the tournament!


There were 4 standard battles in the tournament, and I was really happy with my performance. My list was interesting and fun to play and it proved to be quite deadly. I lost my first game, but then I won the next 3 games with a complete victory 100-0 (I destroyed all other ships without having any of mine destroyed). I finished third out of 14 (I think) participants, tied with the second player (he ended second because he lost his last game in the final, something I could not reach because of losing my first game).

my list, Ten's Friends:
Ten Numb with Heavy Laser Cannon and Marksmanship (41)
Garven Dreis
Biggs Darklighter with R2-D2 and Shield Upgrade
Total: 100


The basic strategy of this list is protecting Biggs so that he does not die too quickly and use Ten Numb and Garven Dreis to destroy the opposition.


And here come the battle reports:

First Battle
In my first game I met Oliver (I think). He played a very nice list with two Interceptors of 9 Pilot Skill and 3 Academy TIEs. The Interceptors were extremely maneuverable and very dangerous attacking, while the Academy TIEs provided some extra firepower while offering the possibility of blocking any easy movement of the opponent.

The game started with the squadrons in opposite corners of the board. The approach was not easy for any of us (I think we both placed the asteroids quite well).
 
We started in opposite corners and then approached each other through the asteroid field

All is quite in the space at the moment
Then a catastrophe happened to my squadron and I lost Biggs in the first shots exchange. My opponent managed to score 6 hits with just 7 dice (actually, 5 hits and a Direct Hit critical)... Not a good way to start the battle...
The Interceptors' lightning movement placed them at ranges 1 and 2 from Biggs. I rolled very poorly my defense dice and as a result lost Biggs in the first fire exchange.

I managed to destroy one of the Interceptors and damage two of the TIEs, and at some point it looked like I could maybe turn back the tide of battle, but Garven Dreis was quickly dispatched and that left Ten Numb completely alone against 4 Imperial spaceships

Soontir Fel prepares himself for a new hunt...

During the last part of the battle I lost all my gambles and my opponent outmaneuvered me most of the rounds. As a result, I could not destroy any of the damaged TIEs and lost by a big margin.


Second Battle
In the second game I met Laura. She played another interesting list, similar to the one I had fought before, though this one had two agile Interceptors and two good TIEs. I saw a weak point in her list: she had one of the Interceptors (I think Carnor Jax) without any modification to add an extra Hull or shield point, and it seemed quite weak.

She started the battle with an Interceptor and a TIE in front of me and the other two spaceships in the opposite corner... I decided to go full throttle and try to get to the ships in front of me before her flanking party arrived... Unexpectedly (or probably because of this being one of her first tournament games), her first movement for the group in front of me was to move 5 forward, so that I had to fight only half of her force before the flanking group arrived and had a big advantage throughout the game.

Also, because she never was able to concentrate enough firepower on Biggs, I kept shrugging damage with R2-D2 and, protected by Biggs, my other two ships scored plenty of hits on the beleaguered Imperial forces.
The flanking party looks helpless as battle starts in the other side of the board

My squadron blasted one of Laura's TIEs in the first exchange of shots, leaving her Interceptor alone against a lot of danger

After dealing with the force in front of me, I veered my ships to receive the incoming flanking party

In the dogfight... I love how I managed to position my three ships so that they cover a lot of space, and Biggs is near them all and must be shot at first

Hunting the last two ships proved quite difficult with lots of maneuvering

Ten gets really close to the last Interceptor... And I still love the pictures taken with my LG G2!


Third Battle
In the third game I met Vas (I think). He had a Rebel list with Biggs and R2-F2, two Dagger B-Wings and a Prototype A-Wing... We met head on and I was luckier than him with the rolls. I managed to destroy his Biggs in the first two combat rounds, and then it was a matter of time for me to mop up the rest of his squadron while he tried to destroy my Biggs without any chance.

Both squadrons met straight on

All my pilots had a higher pilot skill than the opponent's. Maybe this played a roll in me getting through his Biggs before he could damage anything


Fourth Battle
My last battle was against Sven. He had yet another list with two Interceptors and three TIEs. During the battle he tried to flank me several times, but his maneuvers and gambles were never successful and his ships attacked mine almost one by one, so it was relatively easy for me to shoot them down (two X-Wings and one B-Wing shooting the same target can and do make a lot of damage).


The usual setup in opposite corners of the board

Sven placed very well the asteroids, as you can see in this image, because he could use them to protect his advance, but would not have them blocking his movement if he crossed my ships.

The battle is about to start in earnest!

Turr Phennir manages to shoot and get out of the way, but the second Interceptor was attacked by my three ships in the same turn and was destroyed

As you can see in this photo, again Sven's ships were not fighting in unison. Here I managed to destroy one of his TIEs, but could not attack Turr Phennir for the second time in a row, and decided I would leave him for the last.

Again, this photo shows that Sven was always in numerical disadvantage, because he kept on attacking my squadron with only 1 or 2 ships

Finishing the last TIE with Turr Phennir behind... After destroying the TIE, it was a matter of 3-4 more turns before I was able to hunt down Turr Phennir

Conclusions
I was very happy with my list. It's quite robust, because if the opponent cannot destroy Biggs in the first few rounds of fire, it'll be almost impossible to do it later: not only is Biggs recovering Shields, but Ten Numb and Garven Dreis hit very hard and will make the opponent lose some ships.

Garven Dreis is a character that works very well with Biggs, because he can give Biggs a second Focus token and improve his survival chances.

So, I hope I'll be able to join another tournament soon... this was real fun!


May the Force be whith you all!